

Best DC Combiner Box Guide for Safe and Efficient Solar Installations
2026-09-02
Ask any solar installer which component gets blamed last when a system underperforms, and the DC combiner box usually tops the list. It’s small, unglamorous, and easy to ignore—right up until a loose connection or undersized busbar turns a routine check into an emergency. This guide cuts through the marketing noise and focuses on the details that separate a safe, efficient solar array from a liability. From enclosure ratings to fuse sizing and wiring layout, you’ll learn what to check before your next install. And when it’s time to choose hardware, Chang Song offers options designed with exactly these failure points in mind.
What the DC Combiner Box Actually Does on a Solar Array
A DC combiner box sits between the solar strings and the inverter, merging the outputs of multiple parallel strings into one or two heavier-gauge conductors. That might sound like simple wire management, but the box also carries the fuses or breakers that protect each string from backfeeding faults. Without this consolidation, every string would need its own long conduit run back to the inverter, which adds copper cost, voltage drop, and a lot of extra roof or trench work.
The "actually does" part becomes clearer when a fault happens. If one string develops a short or a panel fails, the combiner box isolates that string with its individual overcurrent device, so the rest of the array keeps producing. Many boxes also include a DC disconnect switch, letting an installer or first responder cut the entire array's output from one place instead of walking each row. That single point of control is a major reason inspectors want the box close to the array.
Beyond protection, it often hosts surge protection devices and monitoring leads. Those surge devices shunt lightning-induced spikes away from inverter inputs, while monitoring taps let you compare string currents to spot a shaded or dirty panel group before it drags down the whole system. So the combiner box isn't just a splice point; it's the array's electrical checkpoint where unsafe or underperforming strings get caught.
Matching Enclosure and Busbar Ratings to Your System
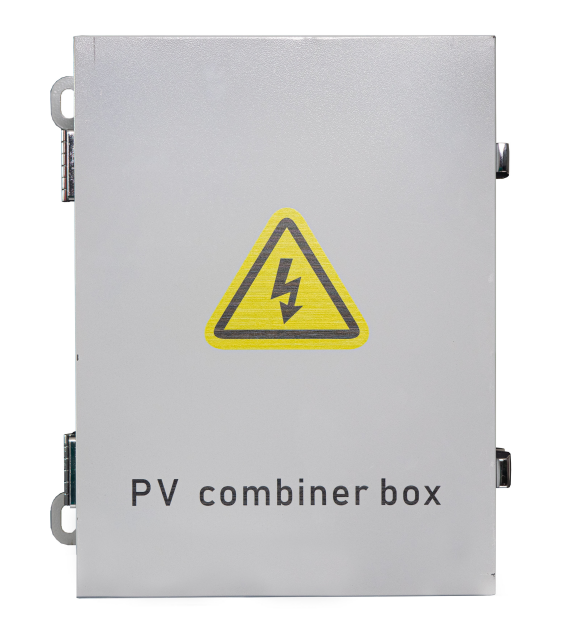
Getting the enclosure and busbar ratings right starts with your actual load profile, not just the nameplate total. Add up continuous and noncontinuous currents, factor in any planned expansion, then compare that number against the busbar's rated ampacity at the expected ambient temperature. A 2,000 A bar inside a sealed outdoor enclosure may behave like a 1,600 A bar once heat builds up, so you need the manufacturer's derating curves before committing to a footprint.
Short-circuit withstand is the other half of the equation. The busbar bracing and the enclosure's internal arc containment must both be rated for the available fault current at the point of installation. If the upstream transformer can deliver 65 kA but the assembly is only braced for 42 kA, you are relying on clearing time and luck. Check the peak let-through current of any protective device, because that often reduces the mechanical stress the busbar actually sees.
Finally, verify dimensional and ventilation compatibility. A high-current busbar run may need extra air gap or forced airflow inside the enclosure, which changes its external size and mounting restrictions. Copper and aluminum bars with the same ampacity rating can have different temperature limits and expansion behavior, so confirm the enclosure material and paint finish can handle the worst-case bar temperature without warping or losing its rating.
Surge Protection and Disconnect Choices That Prevent Downtime
Downtime rarely starts with a dramatic failure. More often it begins with a surge event that degrades insulation or a disconnect switch that cannot be reached quickly when a breaker trips. Choosing surge protection that matches the facility's exposure level, not just the cheapest rating, keeps transient overvoltages from reaching sensitive controls and motor windings. At the same time, placing visible, lockable disconnect switches upstream of critical loads allows operators to isolate equipment without shutting down an entire feeder.
The real value shows up during commissioning and fault response. A well-coordinated surge protector paired with a disconnect that has clear open and closed indication cuts troubleshooting time because the team can isolate a branch, confirm zero energy, and swap a damaged module safely. Without that combination, a single voltage spike can cascade into lost production while someone searches for the right panel or waits for a utility crew. Field experience suggests that the cost of adding a dedicated disconnect and proper surge rating is paid back the first time an event stops at the protector instead of reaching the production line.
Wiring Practices That Keep Voltage Drop Low and Connections Tight
Voltage drop creeps in when conductors are undersized for the distance or when every connection adds a little more resistance than expected. One of the simplest ways to keep it low is to run the shortest practical route and step up the wire gauge before the run gets long. That extra copper costs a bit more, but it keeps lights bright and motors from working harder than they should.
Tight connections start with the right tool, not just a strong grip. Use calibrated torque screwdrivers or wrenches on terminal blocks and lugs, and recheck them after the first thermal cycle. For stranded wire, a proper crimp with a ratcheting tool beats twisting and taping every time, because it cold-welds the strands into a low-resistance bundle that won't loosen under vibration.
It also helps to treat every splice as a potential trouble spot. Keep splices to a minimum, stagger them when multiple wires run together, and seal out moisture with adhesive-lined heat shrink. A light coating of anti-oxidant compound on aluminum or dissimilar metal joints prevents corrosion from building resistance over the years. When the wiring stays cool and the connections stay put, the whole system runs more reliably.
Fuse and Breaker Sizing Without the Guesswork
Getting fuse and breaker sizing right usually means wrestling with code tables, motor inrush curves, and the occasional wild guess. A better starting point is to treat the protective device as a thermal partner: it must ride through normal starts, yet open fast enough to clear a genuine fault. For most small motors, that means a time-delay fuse or a breaker with a properly set instantaneous trip, not just matching amp ratings on paper.
Instead of relying on the nameplate full-load amps alone, look at the actual locked-rotor current and the expected start duration. A breaker sized only for running current may nuisance trip every morning, while an oversized fuse might hold through a fault long enough to damage windings. The sweet spot sits between the motor's inrush tolerance and the conductor's short-circuit rating—typically 175% to 250% of full-load current for time-delay fuses, but you have to check the specific curve for your load profile.
One practical habit is to draw a simple time-current sketch for the circuit: normal start, brief overload, and dead short. Mark where the fuse or breaker should sit on that sketch. If the device's curve doesn't clearly separate the motor's starting envelope from the fault clearing zone, then you're still guessing. Try the next standard size up or down, and verify with a real start or a recorded inrush capture. The goal is a choice you can defend from measured behavior, not from a rule-of-thumb table alone.
Weatherproofing and Maintenance for Long-Term Reliability
Long-term reliability rarely comes down to a single waterproofing product. It is more about how well joints, cable entries, and mounting points are sealed and resealed as materials expand and contract. A bead of silicone that was fine in spring can crack by late autumn, so weatherproofing has to be treated as a routine task rather than a one-time fix. Small gaps around fasteners or connectors let moisture creep in slowly, and by the time corrosion or electrical faults show up, the damage is often already done.
A practical maintenance schedule is easy to build. Every few months, check gaskets for compression set, look for lifting edges on sealant, and clear any debris that blocks drainage channels. Before the wet season, reapply coating to exposed metal parts and replace any cable glands that feel stiff or brittle. If the installation faces strong sun, use UV-stable sealants and inspect plastic enclosures for micro-cracks. These small checks take less time than diagnosing a failure after water has found a path inside.
Keeping a simple log of what was sealed, replaced, or touched up also helps. It shows patterns—like one corner of a housing that needs attention every year—and makes it easier to plan ahead. Different climates demand different intervals; coastal salt air and heavy snow both accelerate wear in their own ways. Adjust the routine to what the equipment actually goes through, and you will catch problems before they become failures.
FAQ
It consolidates multiple DC input strings from solar panels into a single output while providing overcurrent protection, surge protection, and a disconnect point for maintenance. Inside you typically find fuses or breakers for each string and a main DC breaker.
Look for DC-rated fuses or circuit breakers per string, a DC surge protective device, an insulated enclosure rated for outdoor exposure, and lockable disconnect handles. Also check that all internal components are rated for your system's maximum voltage and current.
Match the enclosure to the environment. For outdoor roofs, pick NEMA 4 or IP65 to resist rain and dust. In high-UV areas, fiberglass or polycarbonate boxes hold up better than steel. For indoor utility rooms, a ventilated metal cabinet can work but needs adequate clearance.
Use properly sized PV wire with the right ampacity for each string, keep positive and negative conductors separated to avoid accidental shorts, and use torque screwdrivers on all terminations. Avoid bundling wires too tightly, which traps heat.
Yes, several. Mixing string polarities, using AC breakers instead of DC-rated ones, skipping surge protection in lightning-prone areas, and overcrowding wires so the cover compresses them. Also, forgetting to label each input circuit makes future troubleshooting risky.
Inspect terminals annually for loose connections, check for moisture or pest intrusion, verify fuse continuity, and test the surge protective device's indicator if it has one. Wipe down debris from air vents without opening live parts.
Minimally, if it's well-designed. Every connection adds a tiny resistance, but using quality breakers and clean terminations keeps losses below half a percent. The bigger efficiency risk is undersized busbars or corroded connections, which can create noticeable heat and voltage drop.
It depends on the number of fuse holders or breaker positions, the current rating of the main busbar, and the physical space for cable entry. Always choose a box with at least 20% spare capacity for future expansion or reconfiguration.
Conclusion
A DC combiner box serves as the central hub where multiple photovoltaic strings merge before feeding a single inverter input, consolidating overcurrent protection, isolation, and monitoring into one weather-tight enclosure. Getting the enclosure and busbar ratings right matters just as much as the fuses themselves—undersized copper or a flimsy box invites hot spots and arc faults that no surge protector can fix. Pairing a properly rated disconnect with coordinated Type 2 surge protection keeps a single failed string from dragging down the entire array, while pre-wired touch-safe fuse holders cut troubleshooting time dramatically. Real-world installers often overlook that the combiner is the only place you can safely isolate one string without shutting down the whole system, which becomes critical during rooftop maintenance or when a module underperforms.
Wire sizing is where many installations quietly lose efficiency: a one-volt drop across fifteen feet of undersized PV wire may seem trivial, but multiplied over a 600-volt string it robs the inverter of usable power every sunny hour. Torque every lug to the manufacturer's spec, not just “hand tight,” and re-torque after thermal cycling—loose connections are the leading cause of burn marks inside combiners. Fuse and breaker selection should follow the string's short-circuit current, not the operating current, with a 1.56 safety factor applied per NEC, and never mix fuse classes on the same busbar. Finally, treat the enclosure like outdoor electrical gear: check gasket compression, install a small desiccant pack in humid climates, and schedule a visual inspection every spring before peak production season. A combiner that's dry, tight, and correctly fused will outlast the modules it protects.
Contact Us
Contact Person: Tonglun Chen
Email: [email protected]
Tel/WhatsApp: 8618906642555
Website: https://www.cncsele.com