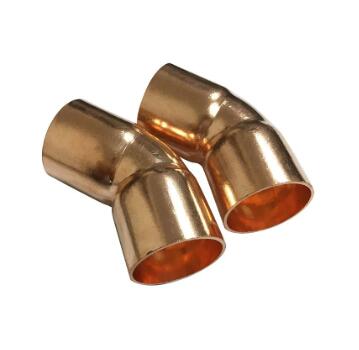
How to Properly Install 45-Degree Elbow Copper Fittings in Your Plumbing System
2024-09-04
Proper installation of plumbing fittings is crucial to the overall functionality and longevity of a plumbing system. Among the various fittings used in piping systems, the 45-degree elbow copper fitting is a common choice due to its ability to change flow direction smoothly and efficiently. However, to ensure a leak-free and durable connection, it’s essential to follow the correct installation procedures. In this blog, we’ll guide you through the step-by-step process of installing a 45-degree elbow copper fitting, as well as provide tips on maintaining your plumbing system.
Step 1: Gather the Necessary Tools and Materials
Before you begin the installation process, make sure you have all the required tools and materials on hand:
- 45-degree elbow copper fitting
- Copper pipe
- Pipe cutter
- Soldering torch
- Solder wire
- Flux
- Sandpaper or wire brush
- Pipe cleaning brush
- Measuring tape
- Safety gloves and goggles
Step 2: Measure and Cut the Copper Pipe
Start by measuring the length of the copper pipe you’ll need for your installation. Use a measuring tape to get accurate measurements, and mark the pipe accordingly. Once you’ve marked the pipe, use a pipe cutter to make a clean, straight cut. It’s important to ensure that the cut is smooth and free of any burrs or rough edges, as this will help create a secure connection with the fitting.
Step 3: Clean the Pipe and Fitting
Before soldering, it’s essential to clean both the end of the copper pipe and the inside of the 45-degree elbow fitting. Use sandpaper or a wire brush to clean the outside of the pipe, removing any oxidation or dirt. For the inside of the fitting, use a pipe cleaning brush to achieve a clean, shiny surface. Proper cleaning is crucial for ensuring a strong, leak-free bond between the pipe and the fitting.
Step 4: Apply Flux to the Pipe and Fitting
Once the pipe and fitting are clean, apply a thin layer of flux to the outside of the pipe and the inside of the fitting. Flux is a chemical agent that helps prevent oxidation during the soldering process and ensures that the solder flows evenly to create a solid bond. Make sure to apply the flux evenly and cover all surfaces that will come into contact during the installation.
Step 5: Assemble the Pipe and Fitting
After applying the flux, insert the end of the copper pipe into the 45-degree elbow fitting. Push the pipe into the fitting until it bottoms out, ensuring that it’s fully seated. The fitting should fit snugly onto the pipe without any gaps. If necessary, adjust the positioning to ensure that the angle is correct and that the fitting is aligned with the rest of the piping system.
Step 6: Solder the Joint
Now that the pipe and fitting are assembled, it’s time to solder the joint. Put on your safety gloves and goggles to protect yourself from the heat. Ignite the soldering torch and adjust the flame to a medium heat. Heat the fitting first, as it’s thicker and takes longer to reach the correct temperature. Once the fitting is hot enough, move the flame to the pipe, heating the joint evenly.
As the joint heats up, touch the solder wire to the seam between the pipe and fitting. The solder should melt and flow into the joint, creating a secure bond. Be sure to move the solder around the entire circumference of the joint to ensure complete coverage. Remove the heat once the joint is fully soldered, and allow it to cool naturally.
Step 7: Inspect the Joint
After the joint has cooled, inspect it for any signs of incomplete soldering or gaps. A properly soldered joint should have a smooth, even bead of solder around the entire seam. If you notice any issues, you may need to reheat the joint and apply additional solder. It’s better to catch and fix any problems now, rather than dealing with potential leaks later.
Step 8: Test the System
Once you’ve completed the installation of the 45-degree elbow copper fitting, it’s important to test the system for leaks. Turn on the water supply and check the joint for any signs of dripping or moisture. If the joint is watertight, you can proceed with the rest of your plumbing project. If you detect a leak, you may need to re-solder the joint or replace the fitting.
Maintenance Tips for Copper Fittings
1. Regular Inspection
Periodically inspect your plumbing system, including all copper fittings, for any signs of wear, corrosion, or leaks. Early detection of issues can help prevent more serious problems down the line.
2. Prevent Corrosion
Copper is resistant to corrosion, but it’s still important to maintain a dry environment around your plumbing system. Avoid exposing copper pipes and fittings to harsh chemicals or standing water, which can lead to corrosion over time.
3. Proper Cleaning
If your copper fittings become tarnished or dirty, clean them with a mixture of vinegar and water. Avoid using abrasive cleaners or harsh chemicals that could damage the finish or integrity of the copper.
Conclusion
Installing a 45-degree elbow copper fitting is a straightforward process that requires attention to detail and the right tools. By following the steps outlined in this blog, you can ensure a secure, leak-free connection that will last for years. Proper installation and maintenance of copper fittings are key to the longevity and efficiency of your plumbing system. Whether you’re a seasoned plumber or a DIY enthusiast, understanding the correct techniques for working with copper fittings will help you achieve professional results in your projects.


